
You’ll find not a single thing more frustrating than a battery issue. You forgot the lights on or there is a inner issue and your Derways model Shuttle battery is dead! Not very comfortable in the event that you have activities to conduct.
Lucky you , the battery replacement procedure is unproblematic and the main specific trouble is acquiring the optimal battery for your Derways model Shuttle.
The battery substitution is very elementary and it will take only three steps!
If you want to discover the ideal battery for your Derways model Shuttle here some proposals that you can obtain on Amazon, a reputable website


After choosing your next battery, observe these following basic steps and you might be fine back again with your car
Prior to replacing your battery, allow us remind you to park the car in a consistent place, emergency break on and be assured the fact that the engine is off!
1 – Remove the battery cables and wires
The battery is installed below the hood of your car. Pull the hood release lever found on the vehicle driver area. Right after you be able to access to the battery, you should see that now there is two cables attached to it. Be very careful, there is one positive cable and one negative cable. You have to bear in mind where these were positioned in or you will definitely be in stress when applying back the new battery on your car.
2 – Take off the unwanted battery of your Derways model Shuttle
Getting rid of the old lifeless battery from your car should certainly not be a trouble. As soon all cables are taken off, just grab the former battery and there you go. Be careful because batteries can be very heavy. If you aren’t sure about your capacity, help could be sweet.
In the event that you find out some dirt or any kind of additional impurities, seize a cloth and keep clean the battery’s receptacle to prevent any sort of concerns for the upcoming step
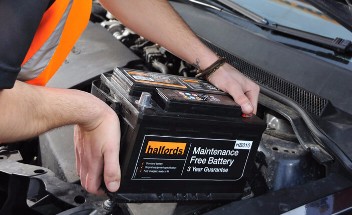
3 – Install the brand-new battery on your Derways model Shuttle
Assuming you completed things perfectly, you will definitely maintain in mind the former battery location. Add the fresh new battery in the corresponding location and join the positive cable on the matching space and very same thing for the negative cable.
Now your car should be working like the first day!
Once your battery is removed, don’t put the out of date battery in the garbage or in the outdoors! This car component is highly poisonous and it is definitely damageable for the environnement. Go recycling the battery or maybe bring it back again in a garage!
Last update on 2019-02-22 / Affiliate links / Images from Amazon Product Advertising API